The example windsurfing video below was created using only one Go Pro Hero HD video camera and some creative thinking.
It was filmed in one lucky afternoon of sailing off the North coast of Puerto Rico. I say lucky because the wind had not blown for 2 weeks prior to the video and I was scheduled to fly out the following day. The point is that with just an afternoon of windsurfing, 1 Go Pro camera and a Mac, I put together a fun and exciting video. Something you can easily do too. Keep reading below after the video to learn how.
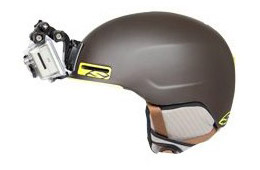
First of all you’ll need a Go Pro handlebar / seatpost mount. This little rig will allow you to mount the camera on the boom looking straight back at you. Having a security lanyard attached to the camera is also a good idea just in case you happen to knock the camera off during a fall, tack or jibe. Secondly, you’re going to need a helmet and Go Pro curved sticky pad mount. With this, you’ll be able to mount the camera on your head to get the second angle.
The trick is to run the same course throughout your video. Try and do the same types of jibes and tacks throughout the runs as well. You basically want to do a few runs with the camera mounted on the boom looking straight at you. After you’ve gathered some footage like that, mount the camera on a helmet and go back out and do the same runs with the helmet on. Once you’ve gathered all the footage you’re ready to put it all together.
You can use whichever editing program you like the best, the concept is still the same. You want to time the runs in each of the clips to somewhat match the point in the course you are at. For example, you want to put together both angles of the videos from the first section of the course, and the first jibe, and so on and so forth. If you are using a multi-track editing program such as Apple Logic Pro this is very easy. You can place one track under the other and simply sync them together. Then you edit parts from each track in and out. When you switch from one track to the next while in sync it gives the appearance of having two different cameras running at the same time. However, you can never see the camera mounted on the boom, or the one mounted on the helmet. It’s simply not there in the clip you are showing – Pretty brilliant if you ask me.


The fact is that it would be easier to get 2 angles if you use 2 cameras. The downside is, it’ll cost more… and the extra camera is going to be visible in the footage. That’s fine if that’s what you are aiming for, but obviously cleaner if you can’t see the extra cameras. Additionally, it’s much cheaper to put together.
You may want a soundtrack for your video. Well, there are various ways to do that but I recommend you stay away from using copyrighted content. This leaves you with the option of finding royalty-free or properly licensed Creative Commons content, paying for music or creating your own. This Garageband tutorial on creating your own video soundtrack might be able to help.
That’s it! Unless you are doing a mind-numbing trick that’s nearly impossible to land twice without having to be brought back to life, you can put together a cool windsurfing video like this using just one camera. Have at it!